Form Strings, Point Symbols
Option Action
1. Form String - Overview
2. Form Strings by Code Library
3. Field Obs Reduction
4. Old Stadia Reduction
5. Import ASCII Points
6. Form a String by Code
7. Translate Point Codes
8. Set up Code Library File
Overview
Points are recorded in the field and tagged with point codes which can be alphanumeric or numeric.
The 'Form Strings' will join points with same code to form a string. e.g. a Fence line.
The user can define that the string is to be formed onto a certain layer and with a certain colour and line style.
The 'Point Symbolisation' assigns a symbol to the point by the code.
The user can define that the point is to be placed on a certain layer, with a certain colour etc.
The 'Check Codes' option will check the codes against the code library and will list any non conforming codes.
This allows you to detect errors in coding
A field job may use many different code types. For example there may be 6 roads in the job.
The first one's points would be coded 'RD1', the second coded 'RD2'...'RD6'.
The Code Library file contains a single definition 'RD*' where the * is a wildcard and can be any number.
This makes the Code Library more compact and manageable.
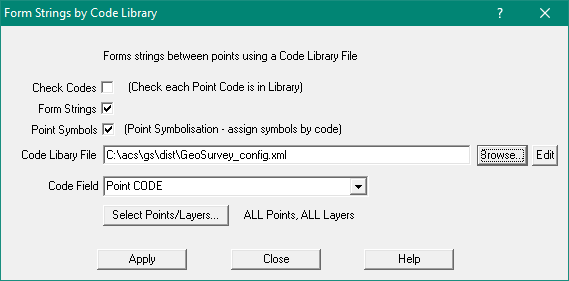
Form Strings by Code Library
Start this using Strings/Form strings by Code Library
This option will operate independently of Field data reduction.
You can form strings on any chosen set of points using any code library.
It performs the following functions:
- Checks codes against the Code Library for errors
- Forms Strings using point codes
- Assigns Point Symbols using point codes
Click here for details of the Form Strings by Code Library.
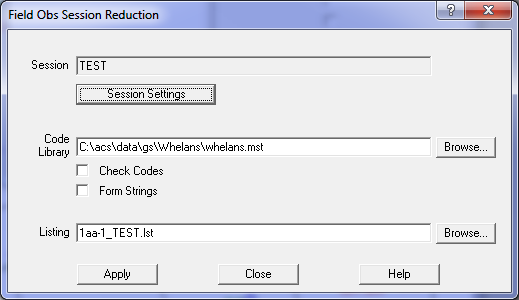
Field Obs Reduction
Use Topo/Field Obs Introduction to read a field data file and the reduce it.
This option has similar options as the option described above.
It performs the following functions:
- Reduces each field observation to a point (optionally) with a code
- Translates the code if 'trans' codes match
- Checks codes against the Code Library for errors
- Forms Strings using point codes
- Assigns Point Symbols using point codes
Click here for details of the Field Obs Reduction.
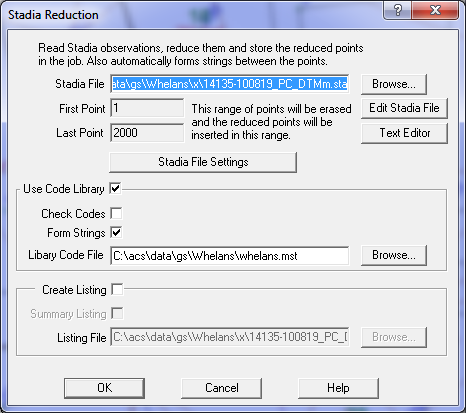
Old Stadia Reduction
Use Topo/Old Stadia Reduction to use this option.
This option is similar to the new feild obs reduction but produces a traditional listing.
It performs the following functions:
- Reduces each field observation to a point (optionally) with a code
- Translates the code if 'trans' codes match
- Checks codes against the Code Library for errors
- Forms Strings using point codes
- Assigns Point Symbols using point codes
Click here for details of the
Old Field Observation Reduction.
Import ASCII Points
Use Conversions/ASCII File/Import ASCII File to start this option.
This option will import a CSV or fixed format file of points optionally with codes.
The user can define the input file format using a template file
It performs the following functions:
- Reads the point from the ASCII file into a GeoSurvey point
- Checks codes against the Code Library for errors
- Forms Strings using point codes
- Assigns Point Symbols using point codes
Click here for details of the Import ASCII File option.

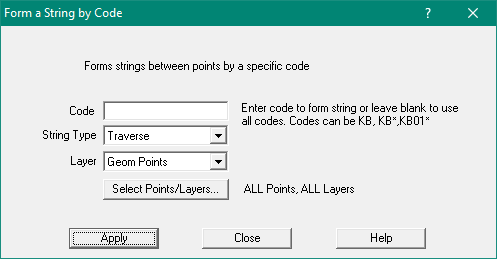
Form a String by Code
Start this using Strings/Form a String by Code
You can use this option to enter a code and it will instantly form a string joining points with that code.
You can specify the type of string to be formed, and the layer.
You can form strings on any chosen set of points using any code library.
Click here for details of Form String by Code.
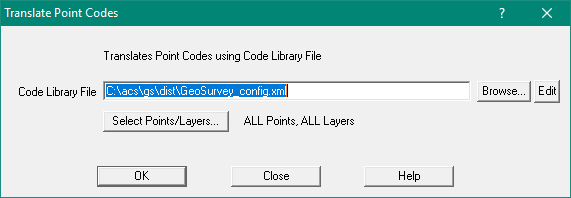
Translate Point Codes
Start this using Point/Point Functions/Translate Point Codes
The can be used to translate numeric point codes to an alphanumeric system
It can be used to translate the point codes into a client point coding sytem.
It checks each point code against the code library 'trans' entries and translates them if possible.
Click here for details of Translate Point Codes.
Setup Code Library
To build your own code library, simply edit the GeoSurvey_config.xml file with a text editor.
You can change the code definitions to suit your own coding system.
You can also edit the 'trans' entries to do translations if required.
If you require a stand-alone Code Library:
- Copy the standard config file GeoSurvey_config.xml to your library name (yourlib.xml)
- Edit the file using a text editor, Notepad or Ultraedit are best
- Delete the lines below <config> down to the start of the <stringCodes> section
- Keep the lines down to the end of the </pointCodes> section
- Delete the lines below that down to </config>, keep that line
- Read the instructions on how to compose <stringCodes> entries, and create some
- Read the instructions on how to compose <pointCodes> entries, and create some
- Create a small job using a smaple of the codes you have defined. It is best if one example opf each code is in the job. EG create two points 5m apart coded 'AB01' to test code 'AB*', repeat this for all codes.
- Create a series ofpoints a few metres apart using each sample code.
- Save a copy of this file before you perform the next step so you can use it again later if you need to test the library again.
- Run the Form String by Code Library on the job to test it.
Click here for details of XML String Codes.